You’ve built it. The mother of all apps. It has everything your users could possibly want and more. Yet they aren’t using it. They fail to appreciate its glory. Is it possible your users don’t quite know where to click? Sadly, I have been there. So, my friends, I give you the Oracle APEX Mega Menu.
Recently, I began researching good UX practices for navigation within web applications. Of course the use of cards came up a lot, but so did the Mega Menu. I have often seen them implemented on sites I like, and have actually grown to expect them a lot of the time. One of the applications at a client site of mine has quite a complicated nested menu that users found confusing, so I wanted to see if a Mega Menu was possible.
The Google found a post by John Snyders that was extremely helpful: APEX Media List Mega Menu, and I used this as the starting point to my work. My first version of my Mega Menu was a simple nested menu of products grouped within categories. Here is the result. Read on to find out how I did it.
List with Sublist Items as APEX Mega Menu
I knew I needed to start with a template that had List Items with Sublist Entries.
Customize the template
John in his post had customized a Media List template in his implementation, and because I wanted to ‘borrow’ (ok, steal) as much as I could, I started with the same and went on to add template information for the sublist entries.
- Make a copy of the Media List template in Shared Components –> Templates
- Give your new template a new name (example: Mega Menu – Media)
- Make the following changes to the template
In the Before List Entry – List Template Before Rows, add this before the ul:

In the List Template Current field, I removed the icon div. It was giving me a hard time!
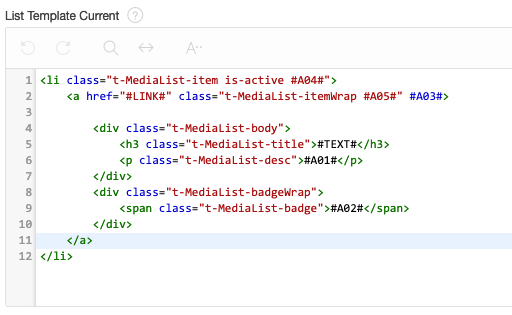
In the List Template Current with Sublist Items, I removed the icon div as well as the closing list tag
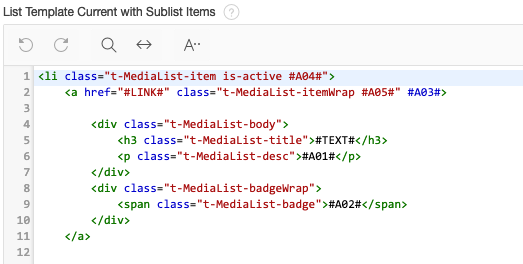
I made the same changes to both List Template Noncurrent and List Template Noncurrent with Sublist Items.
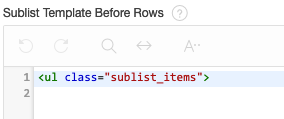
In the Sublist Template Before Rows, I added
In the Sublist Template Current and Noncurrent fields, I added

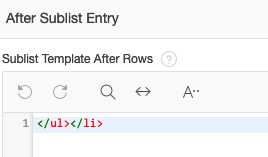
In the Sublist Template After Rows I added
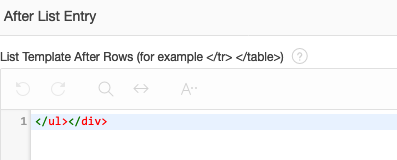
And finally, in the After List Entry – List Template After Rows, I closed my opening div
In the Execute When Page Loads field, again following John’s instruction, I added this:
var e = apex.jQuery("##PARENT_STATIC_ID#_menu", apex.gPageContext$);
    e.menu({ customContent: true });
In the Inline CSS Section, I added this:
.a-Menu-content.mega-menu {
    width: 70%;
    padding: 0;
}

.a-Menu-content.mega-menu .t-MediaList-item {
    display: inline;
}

.a-Menu-content.mega-menu .is-active .t-MediaList-title {
    font-weight: bold;
}


.a-Menu-content.mega-menu .a-Menu-item {
    transition: none;
}
.a-Menu-content.mega-menu .is-focused .t-MediaList-desc {
    color: #FFF;
}

.sublist_items li{
    margin-left:25px;
}

.sublist_items .a-Menu .a-Menu-item{
    line-height:18px;
}

.mega-menu h3{
    border-bottom:double;
}

.mega-menu.a-Menu-content {
    background-color:white!important;
}
.mega-menu.a-Menu .a-Menu-item {
    display: block;
    float: none;
    white-space: nowrap;
    line-height: 20px;
    font-size: 12px;
}
This completed the changes to my Mega Menu Template for Lists with Sublist entries.
Create the List in Shared Components
A list with sublist items begs for a hierarchical query. Wherever you pull your data from, make sure it includes ‘LEVEL’ (1 for top categories, and 2 for items within them).
As a reminder, the syntax for a Dynamic List query is:
SELECT level, labelValue label,
       [targetValue]            target,
       [is_current]             is_current_list_entry,
       [imageValue]             image,
       [imageAttributeValue]    image_attribute,
       [imageAltValue]          image_alt_attribute,
       [attribute1]             attribute1,
       [attribute2]             attribute2,
       [attribute3]             attribute3,
       [attribute4]             attribute4,
       [attribute5]             attribute5,
       [attribute6]             attribute6,
       [attribute7]             attribute7,
       [attribute8]             attribute8,
       [attribute9]             attribute9,
       [attribute10]            attribute10
FROM ...
WHERE ...
ORDER BY ...
We created a list called ‘PRODUCTS’ off the DEMO_PRODUCT_INFO table in the Sample Database Application.
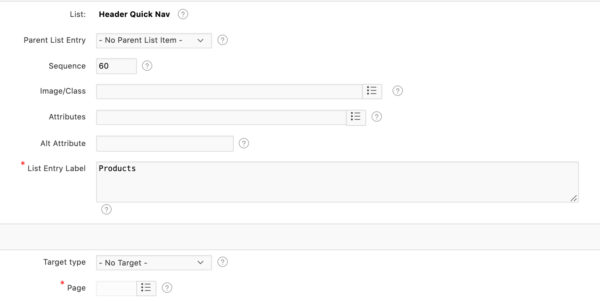
Add an item to the Navigation Bar to trigger the Mega Menu
Add the following entry to the Header Quick Nav:
Global Page
Create a new List region in the Inline Dialogs position on your Global Page (Page 0).
Select the List you created previously (in our case, PRODUCTS).
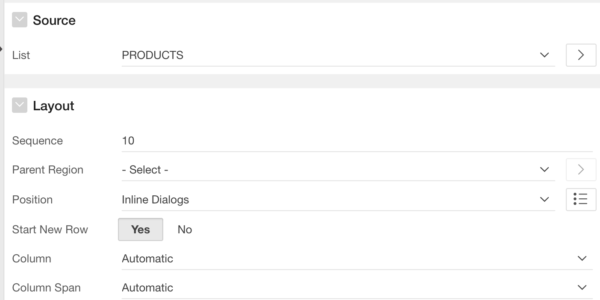
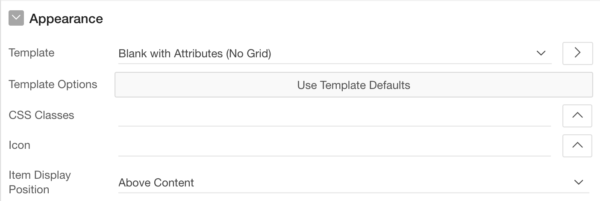
Template should be Blank with Attributes.
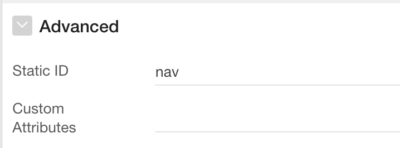
Make sure you enter the Static ID:
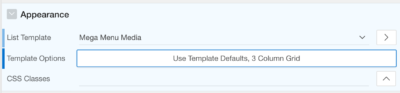
In the Attributes of your region, select your customized List Template you created in Step 1.
Create a Dynamic Action on your Global Page
Event: On Page Load
Action: Execute JavaScript Code:
// swap in the main nav menu
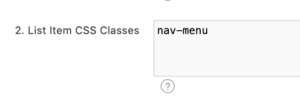
$(".nav-menu > button").attr("data-menu", "nav_menu");
var label,
nextPrev = $(".nav-prev,.nav-next").find("a").removeAttr("href").addClass("t-Button--noLabel");
label = nextPrev.first().find(".t-Button-label").remove().text();
nextPrev.first().attr("title", label).attr("aria-label", label);
label = nextPrev.last().find(".t-Button-label").remove().text();
nextPrev.last().attr("title", label).attr("aria-label", label);
// A custom markup menu doesn't have items until the first time the menu is opened.
// Do that now so the next/prev buttons work
$("#nav_menu").menu("toggle", -99999, -99999)
.menu("toggle");
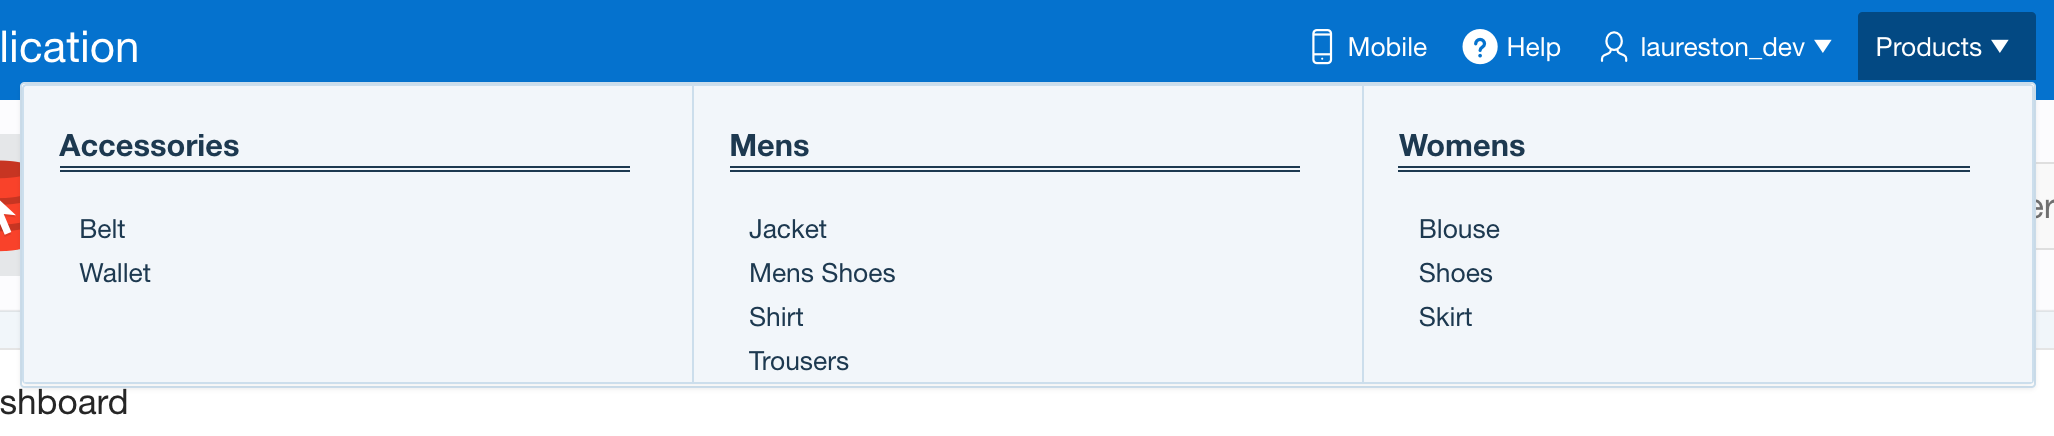
Run your page, click on your menu, and reveal the Mega Menu in all its glory
Next Level APEX Mega Menu
Now that we got the basic Mega Menu working, we can go even further. I wanted to see if I could bang on another div
to my Mega Menu and display a combination of things in it, including product images.
What I ended up with was this:
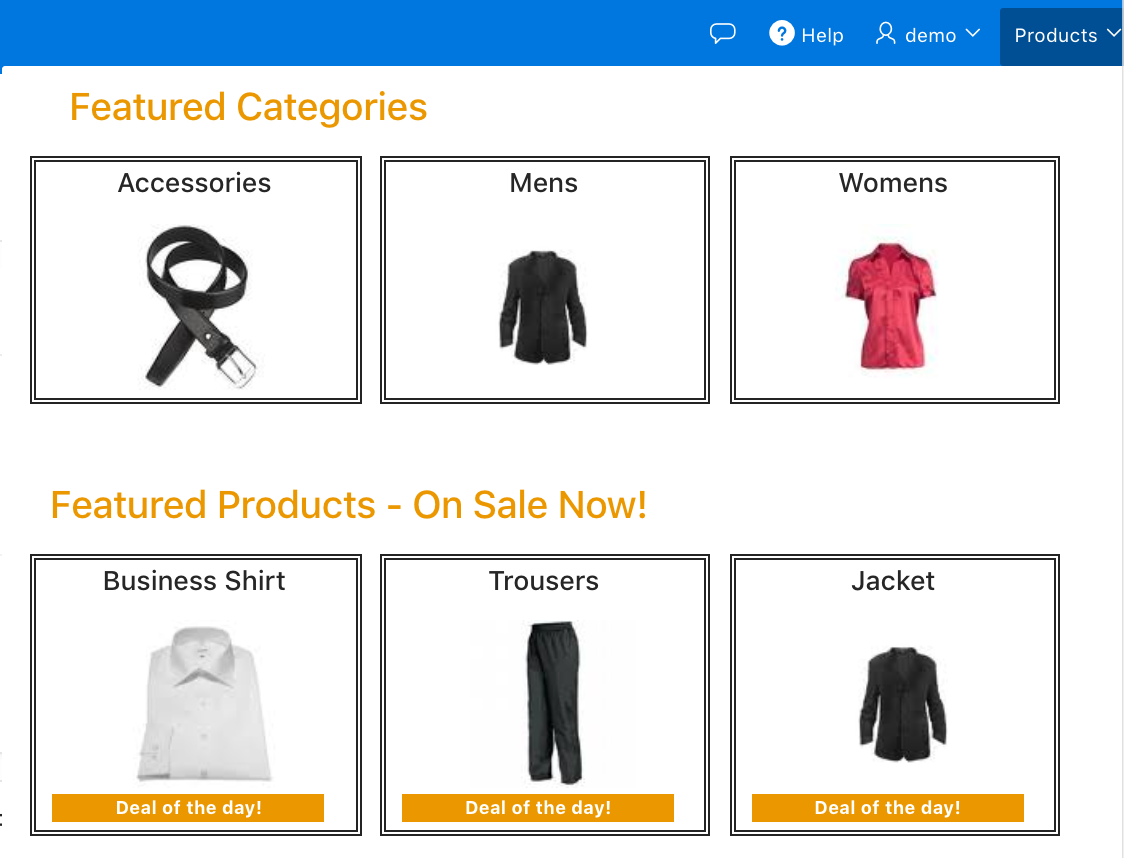
It is basically 2 lists: the first list, Featured Categories, pulls from a List in Shared Components (top level categories only).
The second list, Featured Products, is generated via an Application Process that populates an application item.
I then added the substitution string for this item to a customized template. Read on for more details!
Customize the list template
I struggled with the CSS on this one a lot, because starting with any of the standard List templates meant all sorts of other CSS classes were getting automatically appended to my items, so I decided to go with a FULLY customized list template and started from scratch, using Template Class Custom 1.
You can download the my demo app here, but I wanted to draw your attention to this, in the After List Entry field of my template: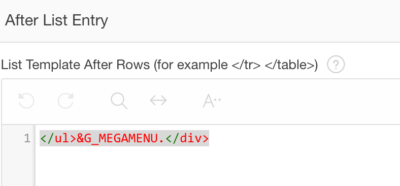
I refer to an Application Item I created, that I populate via an Application Process:
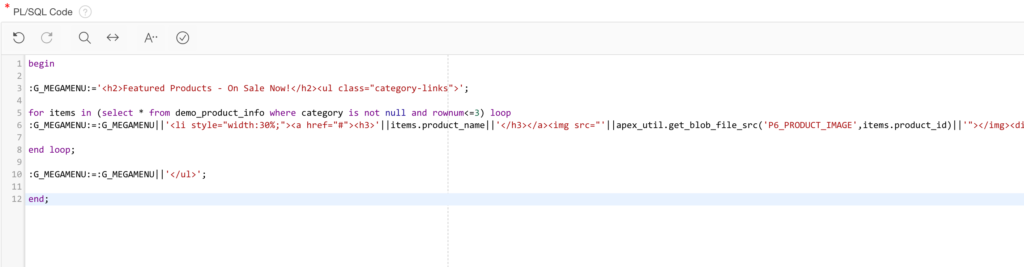
So basically, I can do anything I want here without necessarily being constrained to the list syntax. This is how I generated the ‘Featured Products’ part of my mega menu.
Of course after all this playing around, it did occur to me that there are probably much easier ways to do all this, including simply creating the mega menu contents fully from PL/SQL and then just triggering it’s display with a menu click, but…. I got there a little later, and still thought this was interesting enough to share.
Have you guys created any APEX Mega Menus? Would love to see!
APEXionately yours,
Michelle